Using the CMS
In addition to building pages using drag-and-drop, it's often useful to have standardized sets of content managed in a more classic “CMS” way, where flexibility is less desirable. The list of ways to use this is endless, but they include…
- Team directory
- Service list which each need a detail page
- Events
- Blog posts
- Portfolio
The beauty of the CMS is it's basically as easy as setting up a block. For purposes of this example, let's use a team directory.
Where to put schemas
All schemas are defined in /resources/schemas as yaml files. If you ran php artisan prodigy:install you should already have a schemas folder.
Placing a yml file in that folder will register a schema in the backend.
Setting up the schema
The schema for a CMS is nearly the same as for a block.
- The
typeis the name of the schema. Conventionally, it usually makes sense for this to be plural. - Right now,
rolemust beentry. This is a placeholder for when we build out taxonomies. orderByallows you to define how the entries should be ordered. If you want to manually define the order using drag-and-drop reordering, doorderBy: order. If you want the most recently updated ones, doorderBy: updated_at.- The
field_labeltells Prodigy which field (oftentitle) you want to use as a title in the backend. fieldsare all exactly the same schema, so any available field which is available will work.
type: team
role: entry
orderBy: order

labels:
  singular: Team Member
  plural: Team Members
  field_label: name

fields:
  photo:
    type: image

  name:
    type: text
    rules: required

  slug:
    type: text
    rules: required

  title:
    type: text
    rules: required

  bio:
    type: texteditor
Using the CMS in a block
You can query CMS entries directly within a block, like this…
@php
$team_members = ProdigyPHP\Prodigy\Models\Entry::ofType('team')->orderBy('order')->get();
@endphp

<div class="max-w-[1200px] mx-auto grid gap-4 md:grid-cols-2 lg:grid-cols-3">

    @foreach($team_members as $member)
        <a href="/team/{{ $member->content['slug'] ?? '' }}">
            <x-photo-block :hoverable="true" :block="$member" :headline="$member->content['name'] ?? ''" :subtitle="$member->content['title'] ?? ''"/>
        </a>
    @endforeach

</div>
Creating entries
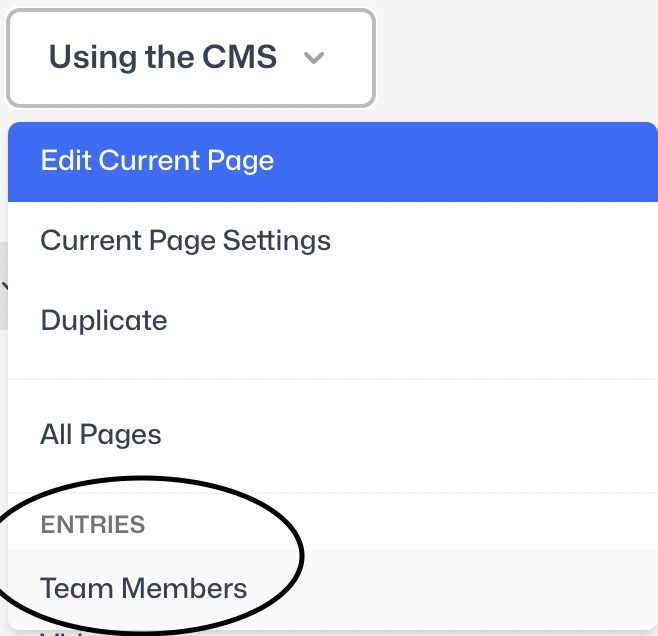
In the backend, you should have a section in the dropdown called Entries which shows your new schema. You can use that section to add and remove entries.